
Affiliate buying guide · Personalized Gifts
Large Canvas Prints From Digital Photos: Size and Resolution Guide
Pickorvia buying guide · Affiliate product links
Compare canvas print options
See the actual product options discussed below. Tap a product image or orange button to visit its CanvasChamp listing. Verify size, customization, final price and delivery before ordering.
Product images are illustrative of merchant listings, not proof of a tested purchase. Prices and configurations may change. Choose and confirm your exact options on CanvasChamp.
Large canvas prints from digital photos work when the original file, chosen crop, and intended wall size fit together. There is no single maximum size that applies to every phone photo. Start with the remaining pixel dimensions after cropping, evaluate the actual detail, and confirm the printer’s requirements for the selected wrap and finish.
A file can contain many pixels and still be blurred. Conversely, a modest image may be useful at a smaller size or viewed from farther away. This guide uses reproducible planning examples rather than promising perfect enlargement. Product information and technical documentation were checked on November 15, 2026; no physical prints were ordered or measured.
Start with the wall and the original image file
Measure the usable wall width and height in inches. Note doors, shelves, lighting, switches, and furniture that limit placement. Then decide whether the picture should be portrait, landscape, or square. Do not choose the largest advertised canvas first and try to force both the room and image to accommodate it.
Find the original image and record its width and height in pixels. A full-resolution file from a camera or phone is preferable to a copy saved from a social feed. Check that you are using the actual original rather than a thumbnail downloaded from a cloud album. Keep an untouched backup before editing.
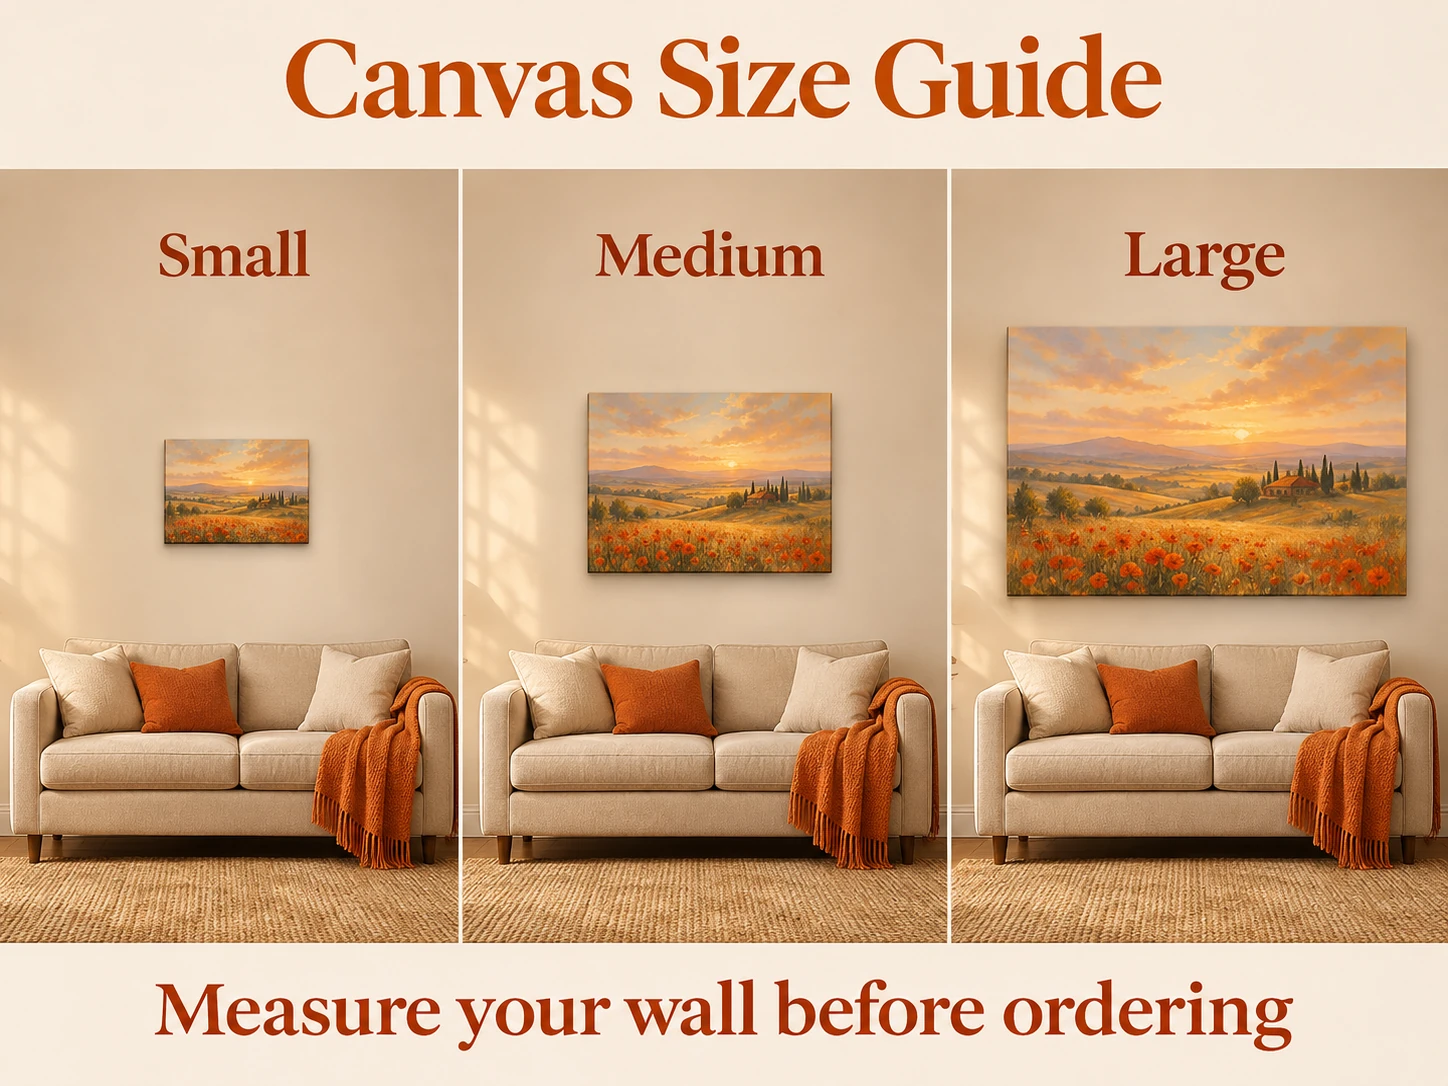
Try a paper outline at the proposed outside dimensions. For example, on a hypothetical 72-inch-wide clear wall area, a 36-inch-wide canvas leaves 18 inches on each side when centered. That is arithmetic, not a decorating rule. A frame may increase the outside width, and nearby furnishings can make the same proportions feel different.
Record the normal viewing position too. A canvas beside a desk is seen differently from one across a living room. The illustrations here suggest layouts; they are not measured scale models. Your measurements and the actual product drawing should govern the purchase.
Work out whether the image supports the intended size
Canvas print image resolution can be planned by dividing the pixels remaining in each direction by the corresponding printed inches. Use both directions and the same orientation. If the ratios disagree, the image and output have different proportions, so a crop, border, or change of dimensions is required.
The following table uses one hypothetical 6,000-by-4,000-pixel image without cropping. Every output has the same 3:2 proportions. These calculations exclude additional wrap, bleed, and production allowances. They describe pixel density only; none is a guaranteed quality threshold.
| Planned face size, width by height | Width calculation | Height calculation | Result |
|---|---|---|---|
| 30 by 20 inches | 6,000 ÷ 30 | 4,000 ÷ 20 | 200 PPI |
| 36 by 24 inches | 6,000 ÷ 36 | 4,000 ÷ 24 | About 167 PPI |
| 40 by 26.67 inches | 6,000 ÷ 40 | 4,000 ÷ 26.67 | About 150 PPI |
A print provider may require different file preparation for its process. Ask whether its recommendations concern the visible face or the complete production file. Also inspect the image itself: fine branches, eyelashes, small lettering, and distant faces can reveal weaknesses that the total pixel count does not.
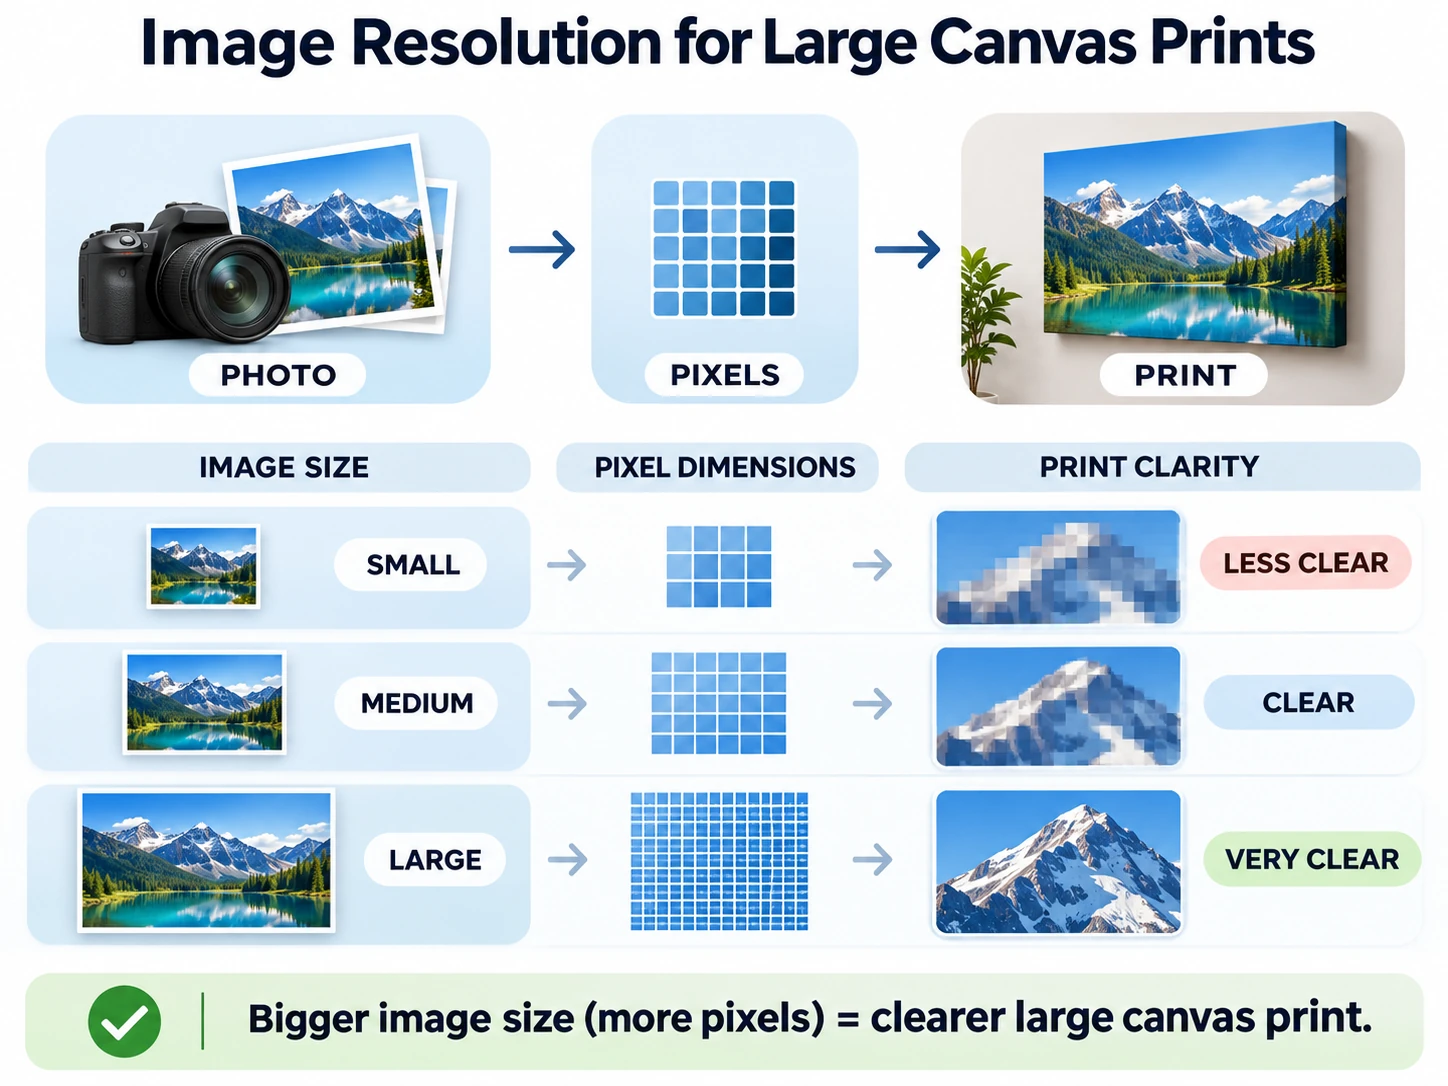
Our research and verification method separates calculations from performance claims. The table is an original worked example. We have not printed that hypothetical file, compared those sizes in a room, or measured the detail visible at a particular viewing distance.
Separate pixel dimensions from a DPI label
PPI describes image pixels per printed inch. DPI usually describes a printer’s dot output, although the terms are often used loosely. Changing a resolution label without resampling does not create new image pixels. Adobe’s explanation of image size and resampling distinguishes pixel dimensions, physical size, and resolution.
For planning, keep the original pixel dimensions visible while you adjust the proposed print size. If software adds pixels, recognize that a resampling operation has occurred. A larger file after that operation does not mean the camera captured more detail. Confirm what the printer needs instead of changing a number merely to make an upload warning disappear.
Know when enlargement cannot solve the problem
Enlargement cannot reliably recover a face obscured by motion blur or restore factual details that were never recorded. Compression blocks, excessive sharpening, and noise may become more visible as the output grows. Inspect the original before investing time in elaborate processing; sometimes a different photograph solves the problem more cleanly.

The sharp-versus-soft illustration is not a print test. A high pixel count helps only when useful image information exists. If a treasured photo is technically weak, consider a smaller print, a larger border around a modest image area, or a book page. Choosing a restrained presentation can preserve the photograph’s character without pretending it supports a wall-filling enlargement.
Choose the crop, wrap and frame together
A canvas has a front-facing image area, side depth, and potentially an outer frame. Those measurements serve different purposes. The front determines the main composition; the wrapped sides determine how edges appear; the outer frame determines the full wall footprint. Ask which measurement a listing means when it gives the size.
CanvasChamp’s edge guide describes image wrap, mirrored edges, and custom-color edges. Its canvas listing identifies depths of 0.50, 0.75, and 1.5 inches. Verify the available combination for your order. These options do not establish a universal file bleed, because the printer may need additional material for its production process.
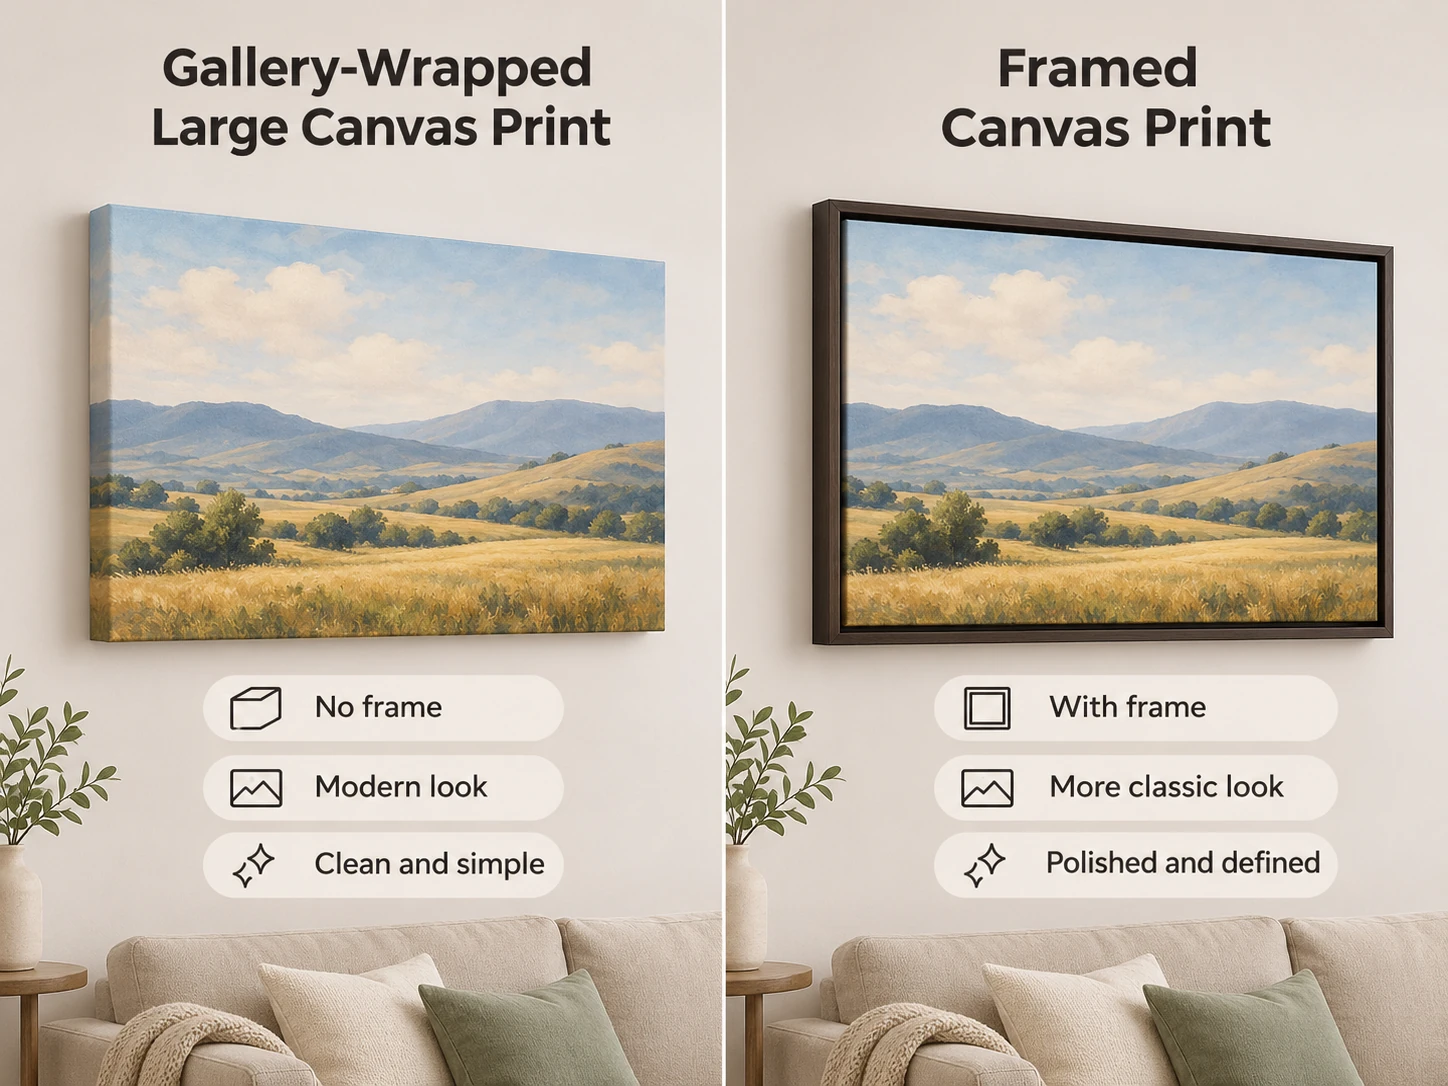
| Edge choice | Visual effect | Design question |
|---|---|---|
| Image wrap | Part of the picture continues around the sides | Will important content leave the front face? |
| Mirror treatment | Edge content is reflected onto the sides | Does repeated content look awkward near a person or object? |
| Solid-color treatment | A chosen color covers the sides | Does that border work with the photo and room? |
| Outer frame | A separate border surrounds the canvas | What are the final outside dimensions and included components? |
For a purely geometric example, a 24-by-36-inch face with 1.5-inch image-covered sides would span 27 by 39 inches across the face and sides. That excludes any extra rear fastening or bleed allowance and is not a CanvasChamp upload template. Use the actual printer’s template instead of adding a guessed margin yourself.
Protect faces, text and important edges
Aspect-ratio changes can remove significant content before wrapping is considered. A hypothetical 6,000-by-4,000-pixel landscape cropped to a square can retain at most a 4,000-by-4,000-pixel area without adding space. That removes 2,000 pixels of total width. Decide which parts of the scene can go rather than letting an automatic center crop make the decision.
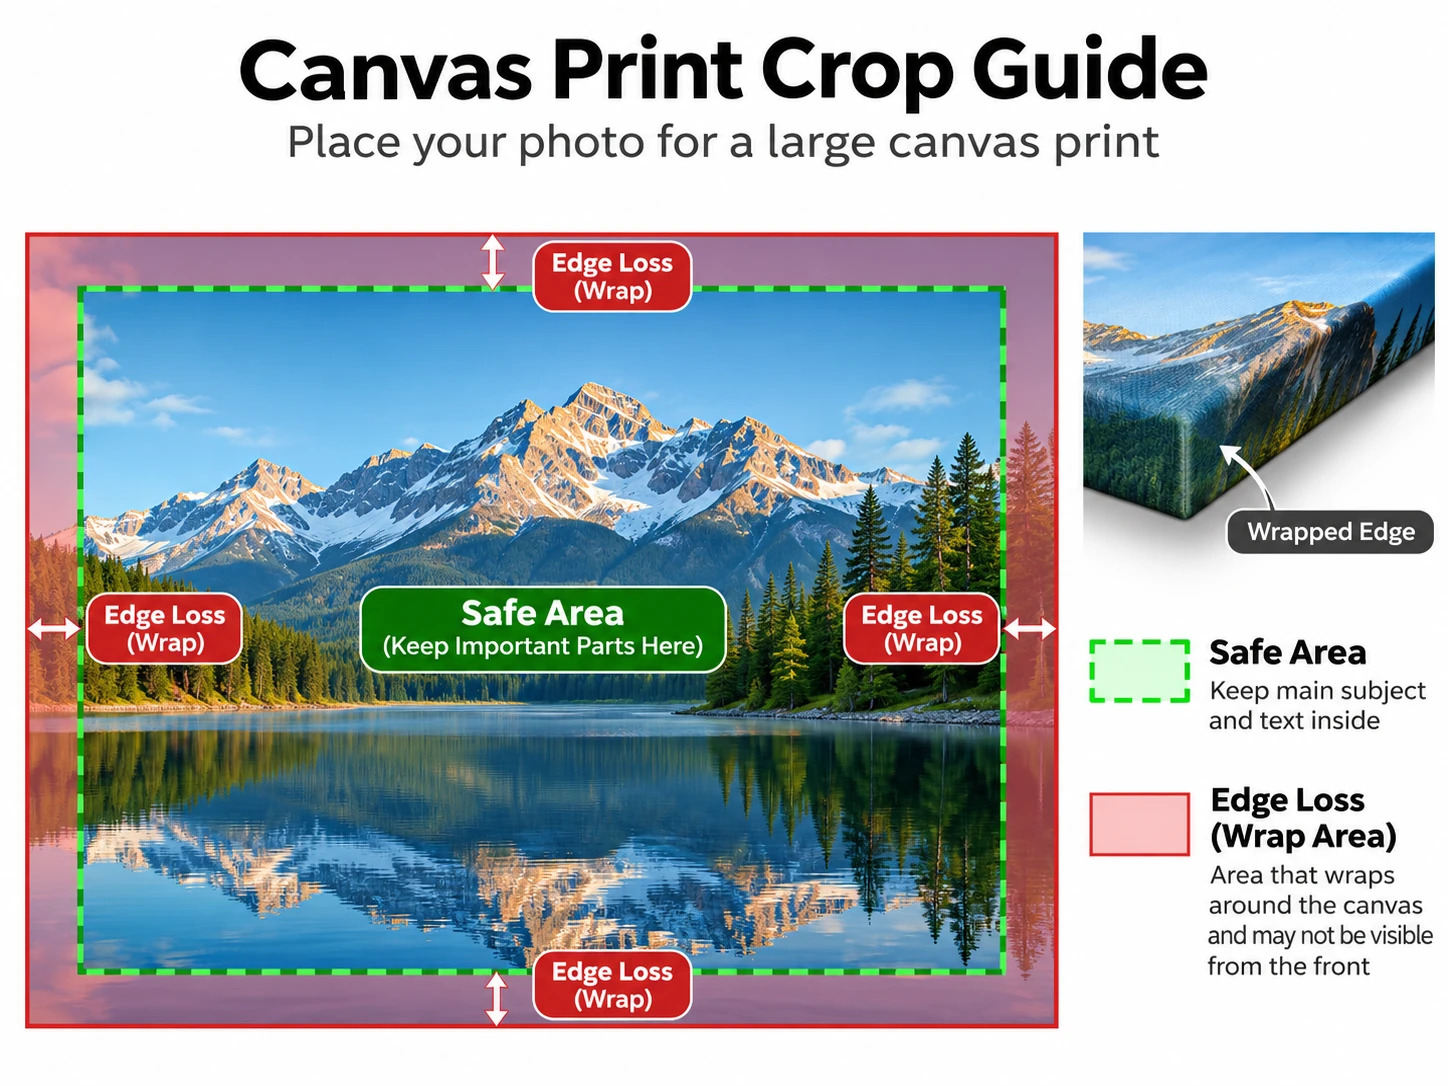
Keep faces, dates, signatures, and other essential details comfortably inside the printer’s stated safe area. Inspect all four sides, not just the center. A mirrored edge can preserve a front composition but may repeat an arm or building in a distracting way. A colored edge may be cleaner, while another source photo may avoid the problem entirely.
Check landscape orientation after upload. Some interfaces rotate a layout or change dimensions when another shape is selected. Revisit the crop after every change of size, wrap, or frame. Saving an earlier preview is useful for comparison, but approval should correspond to the final configuration.
Match the print to the recipient and room
Large custom canvas prints occupy both physical and visual space. Confirm that the recipient wants the photo displayed at that scale, particularly when it includes people or a private moment. For a grandparents’ gift, ask about the wall and existing family pictures. For a partner or dad, consider whether the intended room is private, shared, or used for work.
When the print is a gift, also consider photo keepsakes for grandparents or other photo-gift ideas for him to confirm that wall art is the right choice.
Measure the outside frame dimensions, not only the canvas face. Also plan how the parcel and finished print will reach the room. A large object can be awkward around stairs or narrow passages even when it fits the final wall. Check the selected product’s mounting information and use hardware appropriate to the actual wall and item weight.
Extra large canvas prints do not need to dominate every available surface. A smaller print may leave useful breathing room or fit an existing arrangement. If several photographs matter equally, compare separate modest prints or a book rather than enlarging a collage until it overwhelms the room. Make the display decision with the person who will live with it.
Compare delivered cost and alternatives
Keep the visible size, wrap depth, border, frame, and destination constant when comparing providers. Check whether the item is rolled, stretched, framed, or an accessory requiring an existing canvas. A price for an unmounted print is not directly comparable with a finished framed object. Include any work still needed after delivery.
For seller-wide information beyond image preparation, read our CanvasChamp review before making your final comparison.
| Cost line | What to match | Status for this guide |
|---|---|---|
| Printed image | Same face size and source file | No live quote obtained |
| Construction | Rolled or stretched, with chosen depth | Confirm in the order |
| Finishing | Edge treatment and outer frame | Confirm included components |
| Delivery | Same ZIP code and service level | Order-specific estimate required |
| Final USD total | Shipping, tax, and chosen extras | Not quoted |
This worksheet was prepared November 15, 2026. It does not represent an actual checkout. As a hypothetical calculation, $90 for a configured print plus $20 shipping and $8 tax totals $118. These are illustrative numbers, not CanvasChamp prices. Compare complete totals rather than promotional percentages.

If the image fails the file check, compare a smaller print before paying for enlargement. If exact color is central to the project, ask a print lab about proofing and supported file preparation. No provider is named a quality winner here because we have not conducted a like-for-like physical comparison.
Complete a file-to-order checklist
Keep the source image, edited copy, final preview, and order summary together. Record the cropped pixel dimensions and the intended face size. Verify the wrap and frame selections, then check the outside dimensions against your wall outline. Confirm that the cart still contains the configuration you reviewed.
Before payment, confirm the recipient’s address, total USD, and delivery estimate. Ask how a print that differs from the approved design would be handled. The merchant terms and FAQ use different reporting-window language, so obtain the applicable instructions and contact support promptly if anything arrives incorrectly.
On delivery, compare the object with the saved order before hanging it. Inspect the corners, wrapped edges, surface, and frame, and photograph a discrepancy. Keep the packaging until the inspection is complete. A successful upload or attractive preview is not a substitute for checking the delivered item.
Frequently asked questions
How large can I print my phone photo?
Check the original’s cropped pixel dimensions. A hypothetical 4,032-by-3,024-pixel photo at a planning density of 200 PPI corresponds to 20.16 by 15.12 inches before additional cropping or wrap preparation. This is not a guaranteed maximum or minimum. Focus, compression, viewing conditions, and the printer’s requirements still determine whether that output is appropriate.
Should I use AI to enlarge a low-resolution image?
It can be useful to evaluate an enlarged version, but inspect it against the original. Generated detail may alter facial features, lettering, fur, or architecture. Keep an untouched copy and do not mistake plausible new texture for recovered historical information. If accuracy matters more than size, a smaller print may be the more honest result.
Does a frame change the final wall dimensions?
Usually it adds an outer border, but the amount depends on the particular frame and how it holds the canvas. Obtain the finished outside dimensions from the selected configuration or a product drawing. Do not estimate them by adding the visible frame width alone without understanding overlap and any gap around the canvas.
Final recommendation: order only after the file and wall checks
Proceed when the image contains useful detail, the crop preserves what matters, and the measured outside dimensions fit the room. Confirm the exact wrap, frame, complete delivered cost, and order terms. Choose a smaller format or postpone when one of those essential checks remains unresolved.
The canvas cards above provide routes to inspect current sizes and finishing choices. Let the photograph and the wall determine the order, rather than letting the largest option determine the photograph. A carefully planned moderate print can communicate a favorite image more clearly than an oversized version that exposes every weakness in the file.